


Printmaking techniques explained
There are numerous forms of printmaking. I specialise in three of them - etching and aquatint (both of which are intaglio techniques) and lino printing (which is part of the relief printing family). Others types of printmaking include wood cutting, wood engraving, lithography, monotype, collagraph, dry-point and mono-printing. There are many more.
Intaglio derives from the Italian word for "to cut in". Unlike with engraving, with etching and aquatinting, the "cutting in" to the metal plate is done by exposure to acid. The acid "bites" into the metal and the recesses it leaves behind carry the ink.
You don't need to scratch or gouge the metal plate you're working with. I nearly always use zinc plates, but steel and copper are also popular. What's key with etching and aquatint is that you're always working with acid and acid-resistance layers or varnishes to achieve your desired effects. Take a look at my prawn design below and see its progression from etching to etching and aquatint.
Intaglio | Etching & aquatint

what is an etching?
Etching is all about lines.
You start with zinc plate, on which you roll a layer of acid-resist beeswax. To make lines, you simply draw through the layer of wax with an etching needle (no scratching necessary). When you're done with your design, you pop the plate into a bath of diluted nitric acid. The longer you leave it, the stronger the line. Once that's done, you clean off the wax, apply in all over the plate and the carefully remove it all again. The ink remains in the lines you made which the acid etched into the zinc. All that remains is for you to print it.
The etching you see above of the prawn looks like a drawing - and in a sense, that's what it is.

what is an aquatint?
Aquatint is all about tone. Etching on its own can't produce tone. You can suggest it with line and cross-hatching, but you can't get a smooth uniform tone. This is where aquatint comes in. I always start with an etching first, but you don't have to. Many artists go straight into the aquatint and never do any hard lines. The process is complex, but to make it simple, you apply a layer of dusty particles over the surface of the plate, which you melt on. This gives the surface of the plate a grainy quality which is able to evenly carry ink.
You control the tones with gradual exposure to the acid and the application of stop out varnish. In the example you can see above, I stopped out most of the image, only allowing limited tones to show on the body of the prawn, but then I stopped out the whole thing to allow the acid to develop a deep, rich, velvety tone to the background.
relief printing
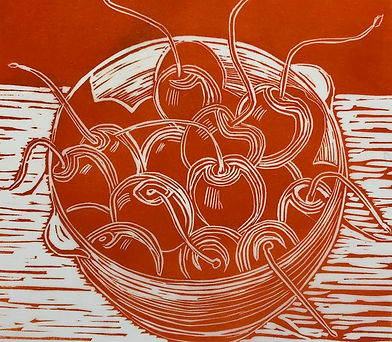
The relief printmaking family includes wood cutting, wood engraving, collagraph, mono printing, lino printing and even potato printing. With relief printing, it's the raised areas of your block that carry the ink, not the recessed ones as is the case with etching, so, if you're starting a new design (and assuming you're using white paper and black ink) where you cut away with your lino cutting tool, your print will show the white of the paper. The rest will be black. Lino printing was developed in Germany as an easier alternative to wood cutting. Just as the zinc I use for etching is more or less the same that which is used for roofing, the lino I use is effectively linoleum flooring material. Many people use MDF to make prints with (I haven't tried that yet).

what is a lino print?
With its origins that are lost in mists of time, block printing of all types includes lino printing. A simple lino print, like the Fennel you can see above, are quick and easy to do. In fact, you can buy starter kits for lino printing very cheaply. All you do is carve your image into the lino, or polymer, remembering that where you cut will be the colour of the paper you're printing on. My advice for anyone embarking on their first lino print? Simplify and exaggerate.

What is a reduction lino print?
This is one of the ways of producing multi-coloured prints. There are loads of options, but this is the one I like. But you have to be brave. And patient. And clear-headed.
With reduction prints, you start by printing a complete edition - you have to. You print the lightest colour first. Once you've done that, you cut away everything you want to stay in that light colour and you print again with your next colour. And so forth until you've achieved what you want. Take a look at the Reindeer above and you'll see I printed three colours.